
Installing a trampoline in-ground is useful if you don’t want to move it especially during mowing. An in-ground trampoline protects from getting hurt and makes the yard’s aesthetics look better.
To build the trampoline in the ground properly you should do it the right way otherwise you could end up paying two times for the same job.
All trampolines are not built to be installed underground and they are expensive. However, you can install any trampoline with this method.
Installing a trampoline in-ground makes the area more clean and systematic. Also it almost eliminates the chances of getting hurt from falling off the trampoline a sit is with ground level.
How to Build in Ground Trampoline
To build the ground in-ground trampoline you have to dig a trampoline hole, assemble the trampoline frame and other accessories and set it in the ground.
Precaution: Before you dig make sure that there are no sewer or water lines below the ground where you are going to build your in-ground trampoline. This you can know by calling your city service ‘call before you dig’. This will ensure you do not damage any important connection in your area which can cause trouble to you and your neighbors.
Step 1: Dig the Trampoline Hole
Before you dig the trampoline hole put the frame on the place where you want the trampoline to be installed and mark the boundary on the ground with paint.
The mark on the ground will guide you while digging it. Make sure to mark the hole a few inches(1 foot extra) more than the trampoline diameter. This is to give you a little extra room when you place the trampoline in the hole.
You can dig the hole yourself but it would take several hours or you can contact a digging service company in your city(just google it), but this will raise the cost of your trampoline build-up.
There are two holes to be dug, an outer hole while is less deep and an inner hole. The outer hole should be only 10 inches for the outer hole(dig this for the entire hole first, then dig the inner hole).
The diameter and depth of the inner hole vary as per the trampoline sizes. Follow the 2 less rule for the inner hole, that is dig the inner hole 2 feet less in diameter than the trampoline’s actual diameter size.
Follow the table to know the perfect depth and diameter of the inner hole.
Hole Dimensions for Round In-ground Trampoline
| Trampoline Size | Inner Hole Diameter | Inner Hole Depth | Outer Hole Depth | Outer Hole Width |
|---|---|---|---|---|
| 8ft | 6ft | 30″ | 25 cm(about 10″) | 20 cm(about 8″) |
| 10ft | 8ft | 30″ | 25 cm(about 10″) | 20 cm(about 8″) |
| 12ft | 10ft | 36″ | 25 cm(about 10″) | 20 cm(about 8″) |
| 14ft | 12ft | 36″ | 25 cm(about 10″) | 20 cm(about 8″) |
Hole Dimensions for Round In-ground Trampoline
| Trampoline Size | Inner Hole Diameter | Inner Hole Depth |
|---|---|---|
| 10ft*6ft | 8’6″*4’8″ | 30″ |
| 11ft*8ft | 9’8″*6’8″ | 30″ |
| 14ft*10ft | 12’8″*8’6″ | 36″ |
Digging a perfect size hole is difficult, therefore dig a little more than required which will accommodate the outer wall. This extra space will be back-filled at the end. Keep some of your excavated topsoil close by the hole for backfilling.
Step 2: Assemble the Trampoline Frame

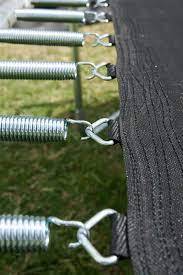
Assemble the trampoline frame, the mat, and springs on the frame. The spring can be attached by following the 3 o’clock, 6 o’clock, 9 o’clock, and 12 o’clock on the frame as this makes the tension even and makes it easier to fit.
Step 3: Move the Trampoline in the hole
Place the trampoline legs in the outer hole. The height of the trampoline frame should be even at the ground level of your yard. Fill the gap and make it compact by backfilling the soil.
Step 4: Attach the vented pads over the spring
Attach the vented pads over the trampoline. This will prevent any animal from entering the hole. The pads can be attached by using a screwdriver to push the elasticated toggles between the frame and the wall of the hole.
Read Next: How to turn a trampoline into a pool